For Logo setting , Go to System > Setting > Edit > Images,
From Store Logo you can upload your logo image.
![]()
Thank You For purchasing Templatemela Opencart Theme.
If you have any questions, please feel free to contact us via our support form https://www.templatemela.com/support. Thanks again for your purchase.
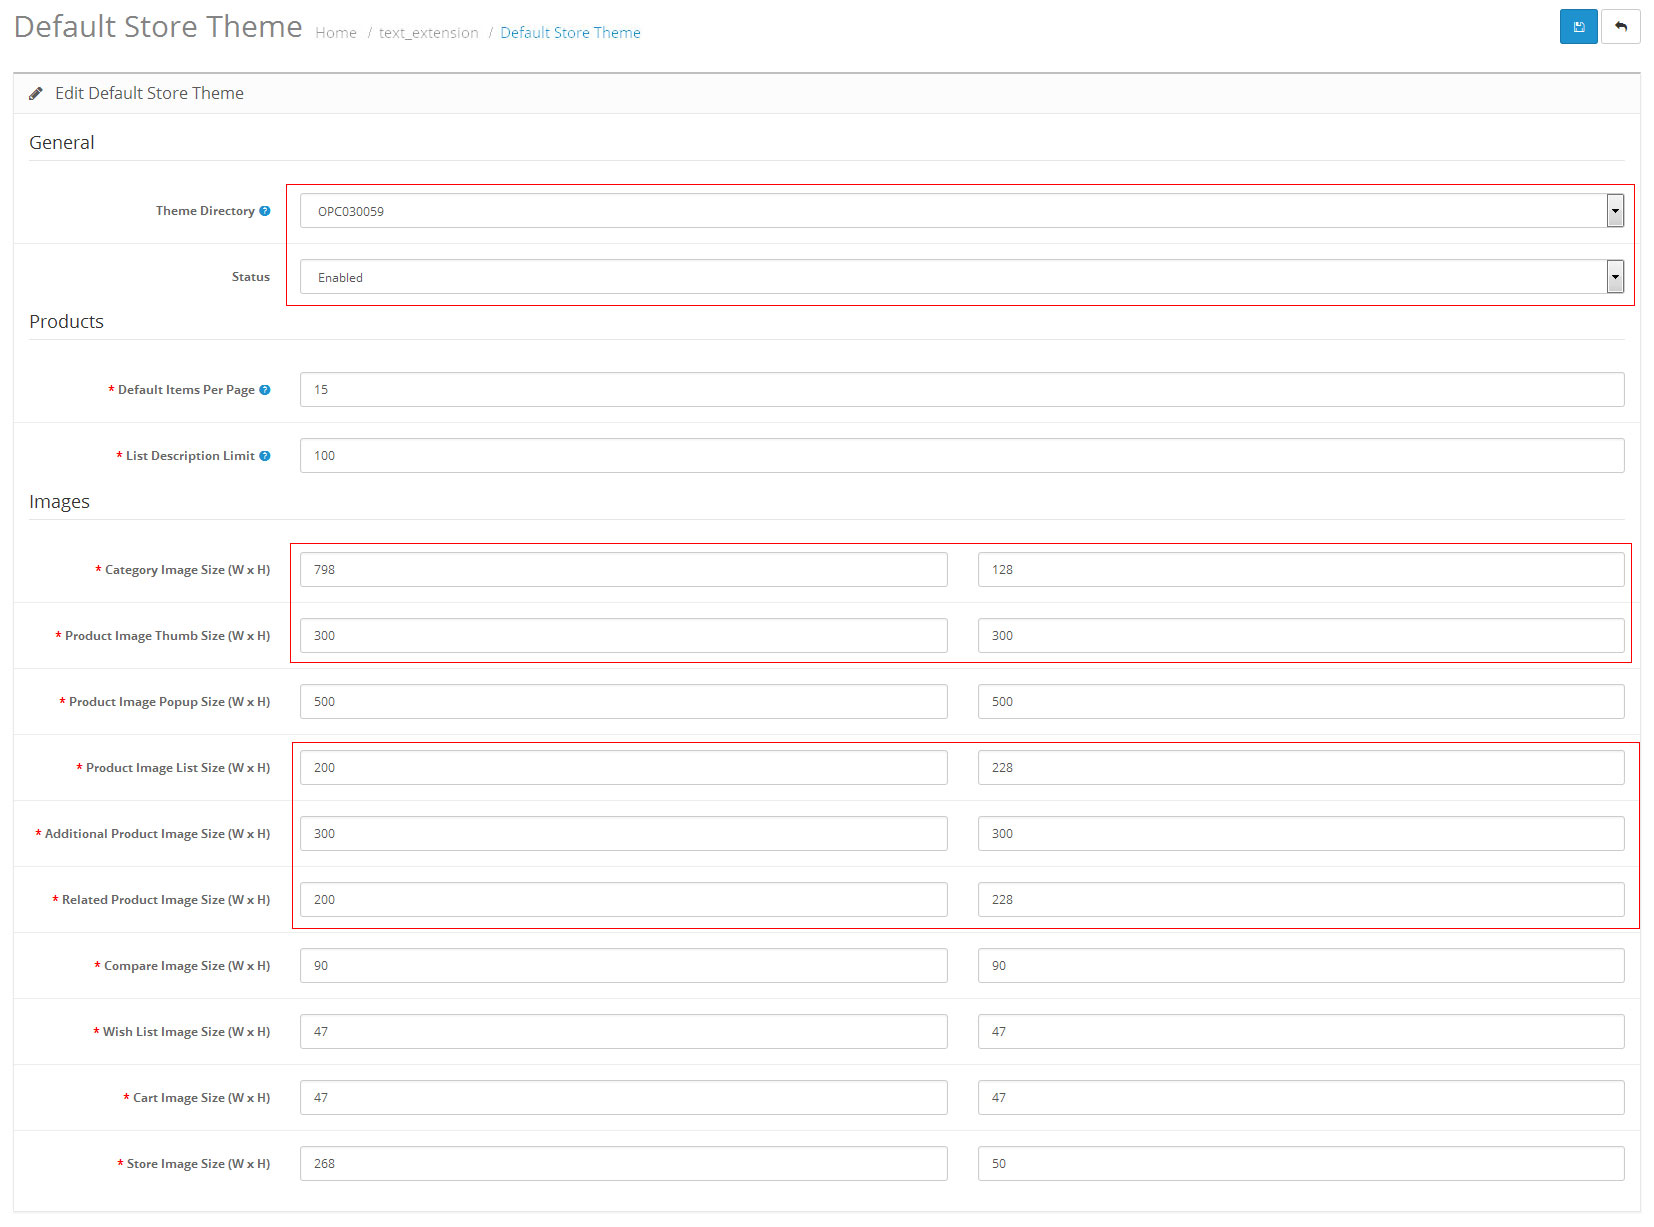
For Image Size setting,
Change Category Image Size to : 798 X 128,
Change Product Image Thumb Size to : 300 X 300,
Change Product Image List Size to : 200 X 228,
Change Additional Product Image Size to : 300 X 300,
Change Related Product Image Size to : 200 X 228,
And Click on “Save” button at top right corner.
For Logo setting , Go to System > Setting > Edit > Images,
From Store Logo you can upload your logo image.
![]()
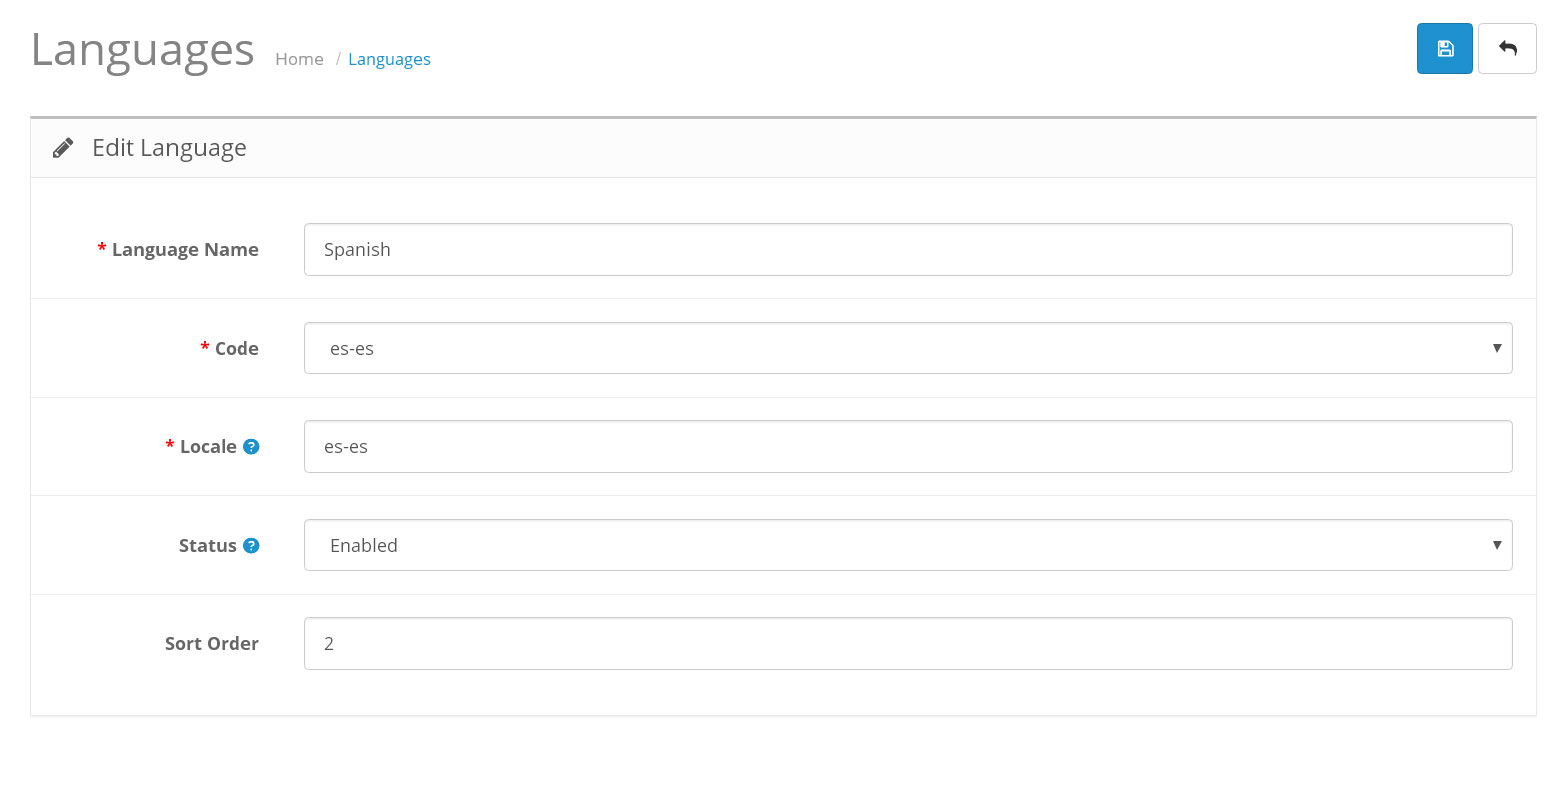
For Example To add Spanish Language :
Go to System > Localisation > Languages,
Click on “Add New” button to add new Language.
Language Name : Spanish
Code : es-es
Locale : es-es
Status : Enable,
Sort Order : as you like.
Click on “Save” button.
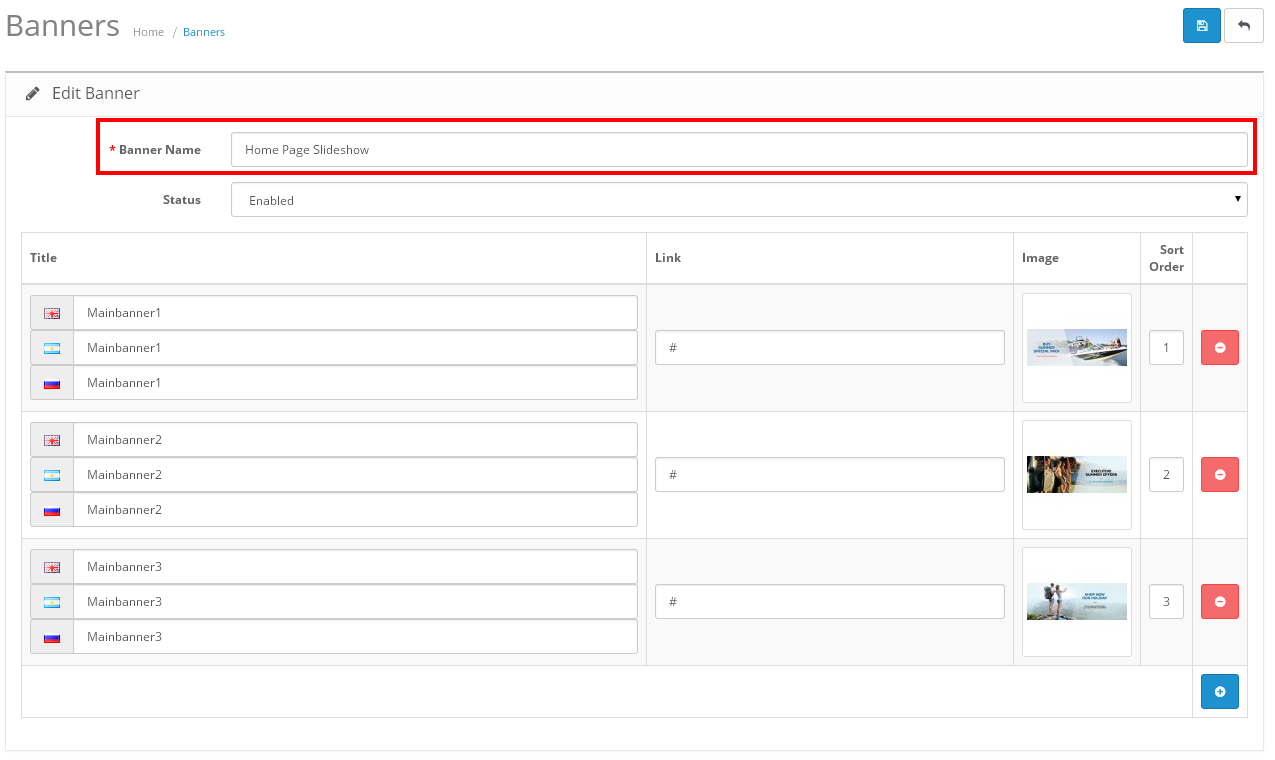
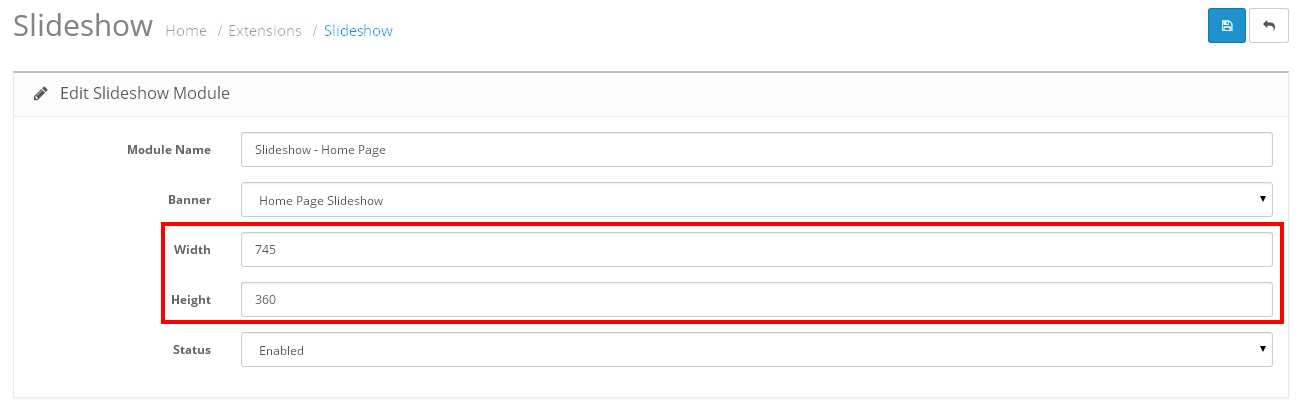
For adding Main banners go to Design > Banners.
(disable HP Products Tab by clicking edit button)
Click on “Add New” button to add new banner.
Give Banner Name: Home Page Slideshow,
From status select Enabled,
and click on “Add Banner” button.
Give title of your banner and click on image to upload your banner.
Again click on “Add Banner” button and upload another banners.
Now click on “Save” button.
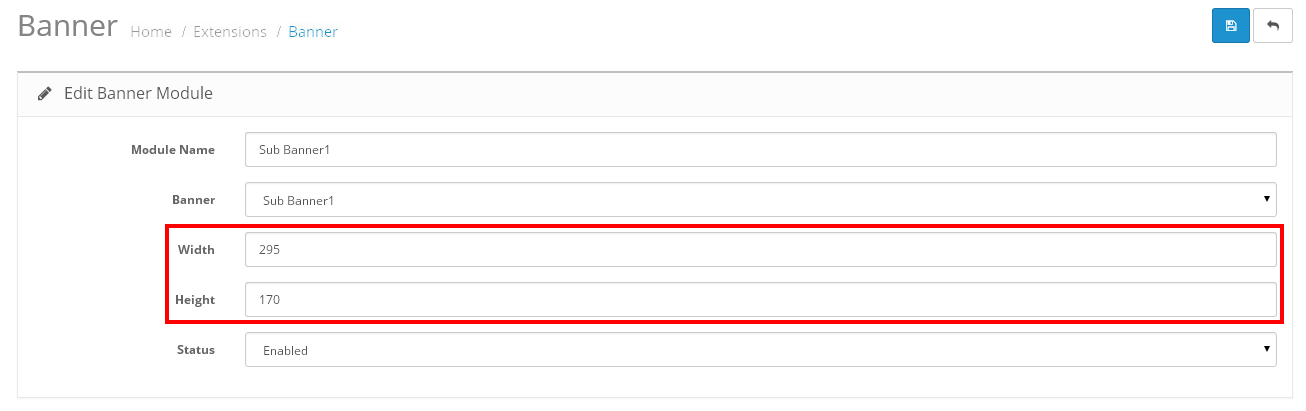
For adding Sub banner go to Design > Banner.
(disable HP Products Tab by clicking edit button)
Click on “Add New” button to add new banner.
Give Banner Name: Sub Banner1,
From status select Enabled,
and click on “Add Banner” button.
Give title of your banner and click on image to upload your banner.
Again click on “Add Banner” button and upload another banners.
Now click on “Save” button.

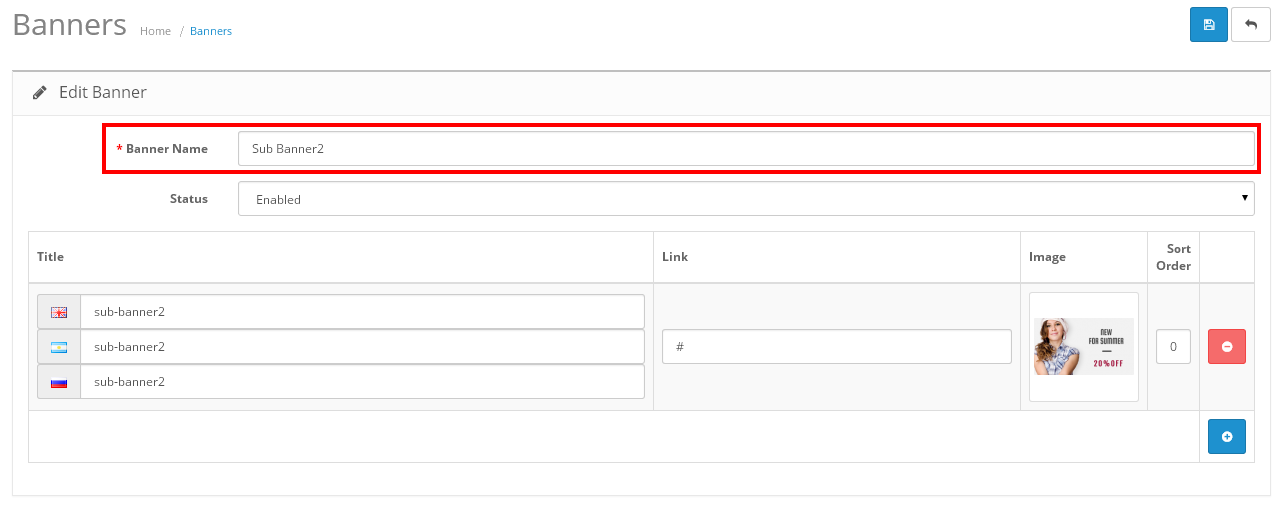
For adding Sub banner go to Design > Banner.
(disable HP Products Tab by clicking edit button)
Click on “Add New” button to add new banner.
Give Banner Name: Sub Banner2,
From status select Enabled,
and click on “Add Banner” button.
Give title of your banner and click on image to upload your banner.
Again click on “Add Banner” button and upload another banners.
Now click on “Save” button.

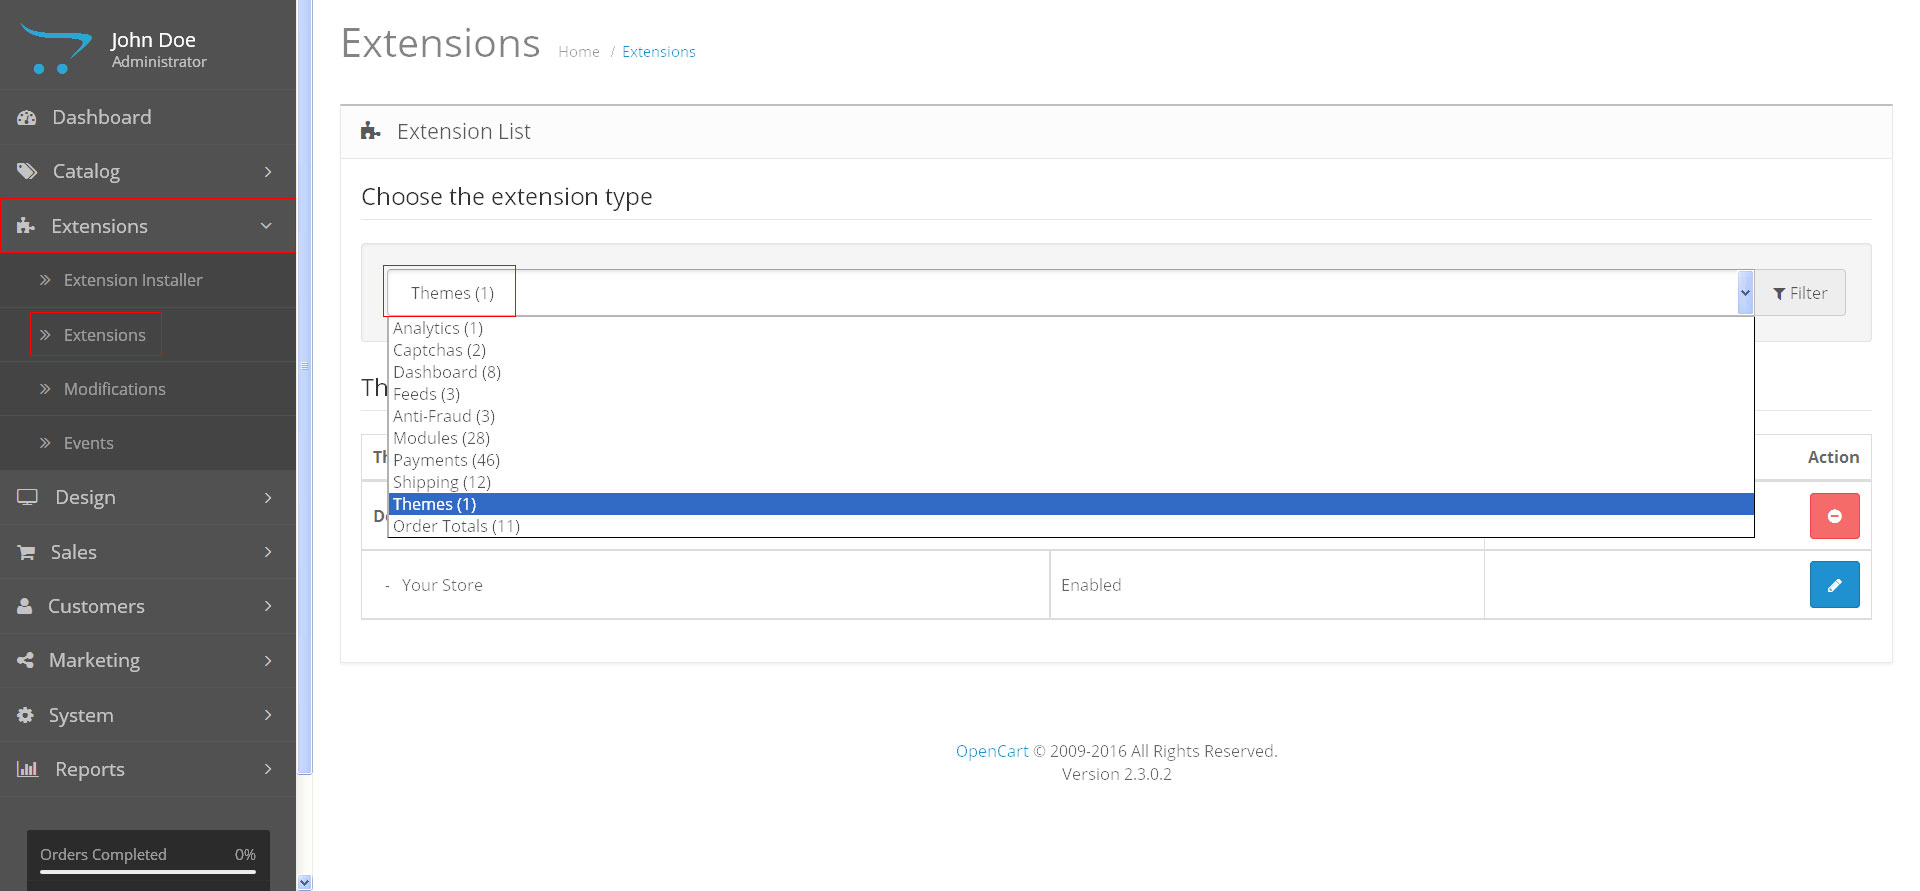
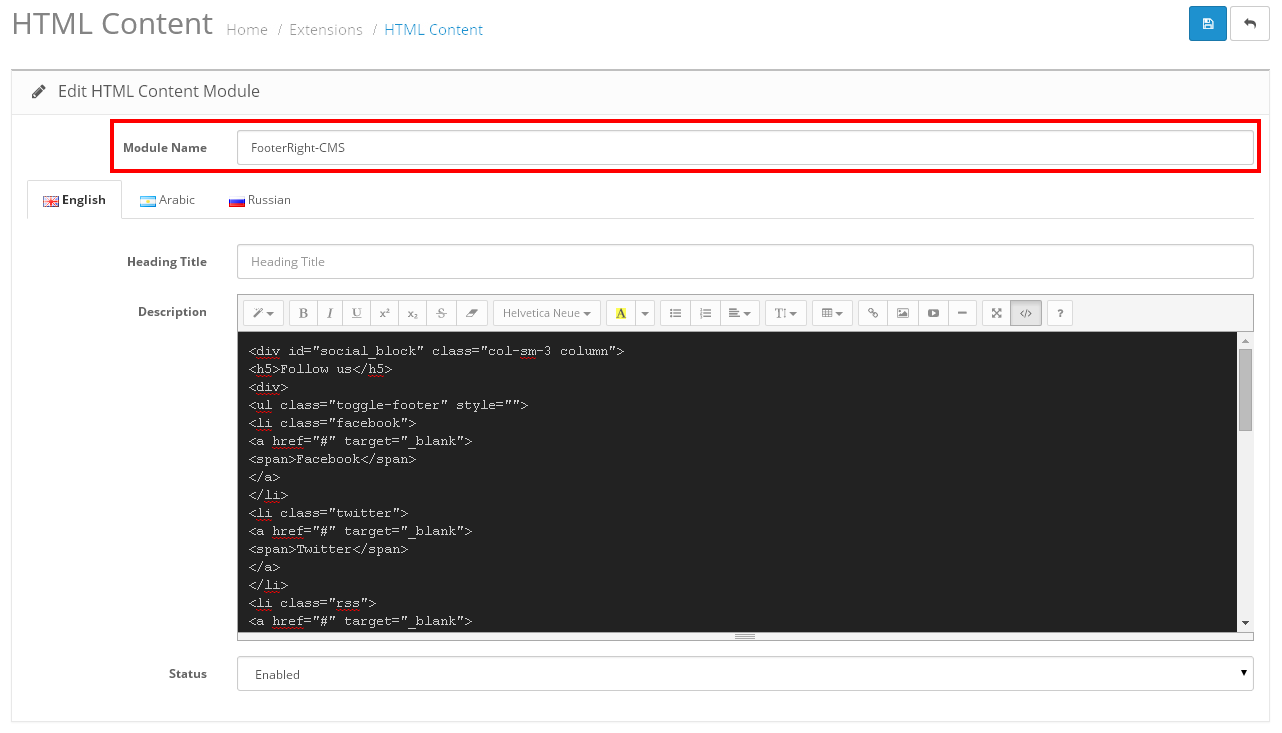
Go to Extensions > Extensions. Select Modules from Dropdown.
Now select HTML Content, then click on Install (After install click on "Edit" link),
For FooterRight-ContactUs-CMS
Again Click on Add Module to add cms block.
Give Module Name: FooterRight-CMS
Now click on Code View button in text editor block ,copy and paste this code, After this again click on Code View button to save your HTML content.
Go to Extensions > Extensions. Select Modules from Dropdown.
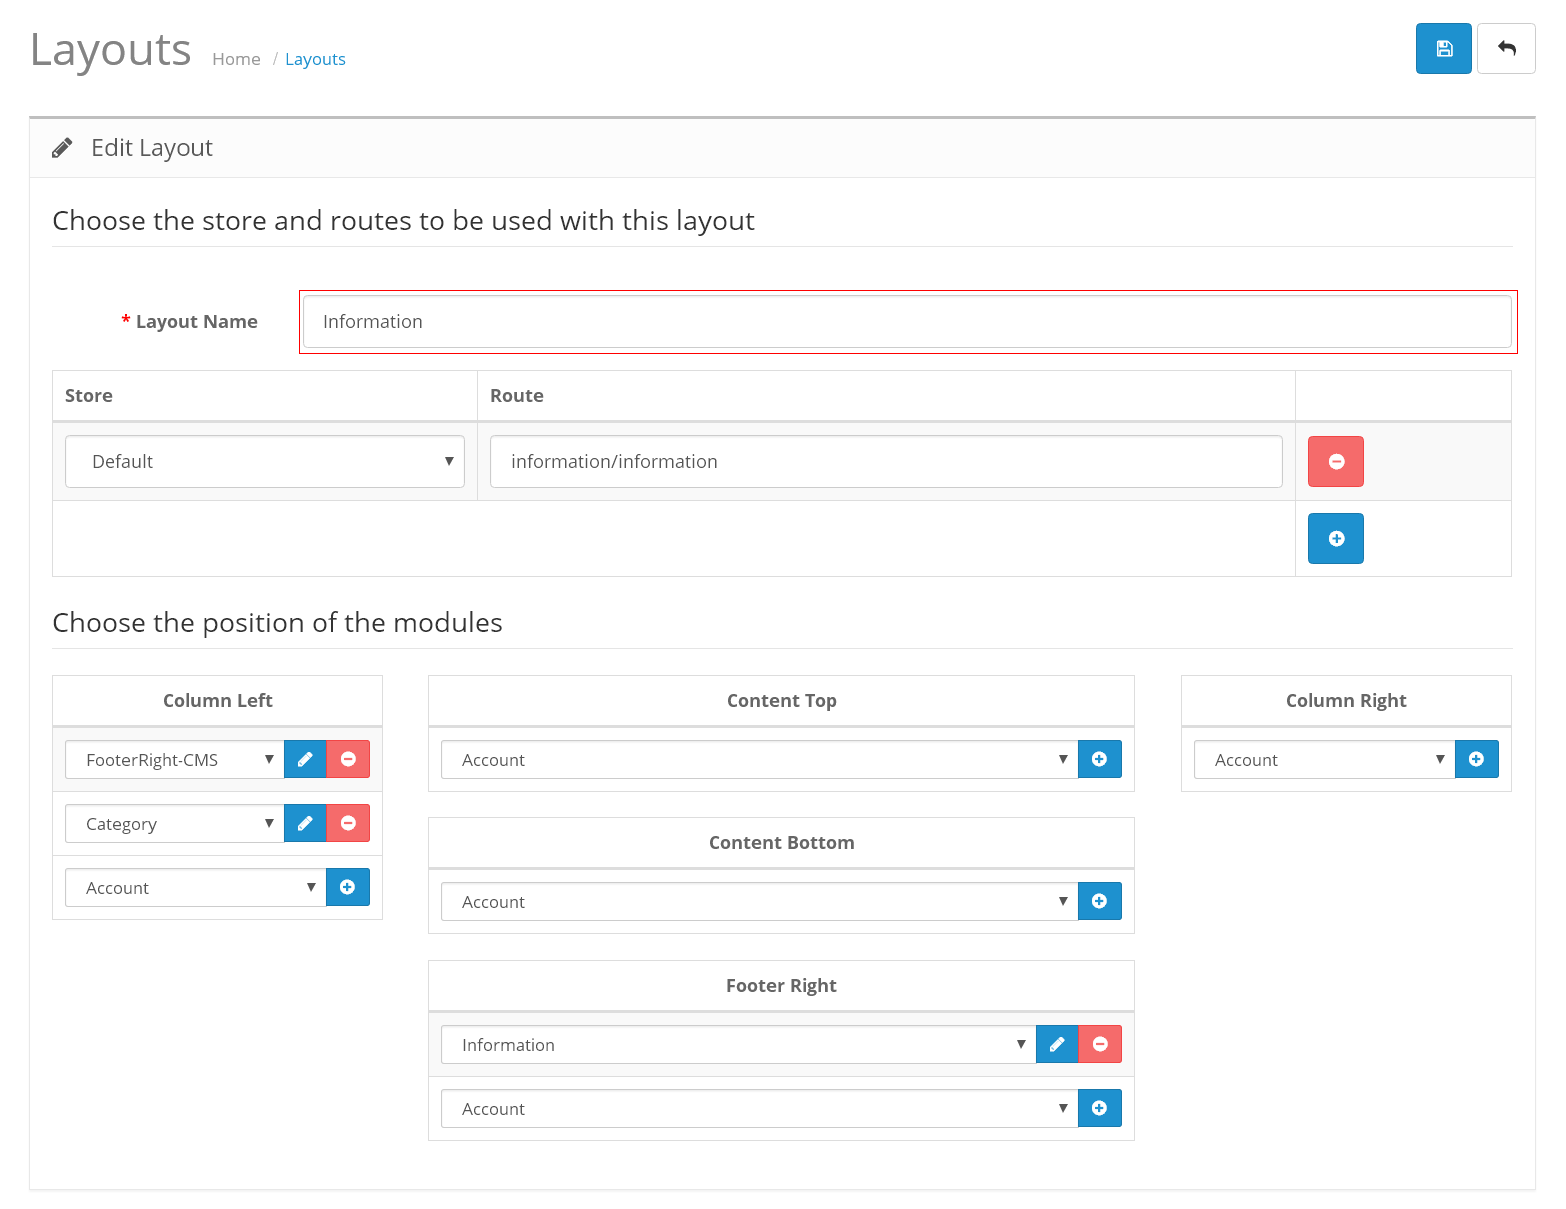
Now select Information, then Edit (Click on Install link if Edit link is not there),
From Status select Enable,
Click on “Save” button.
Go to Extensions > Extensions. Select Modules from Dropdown.
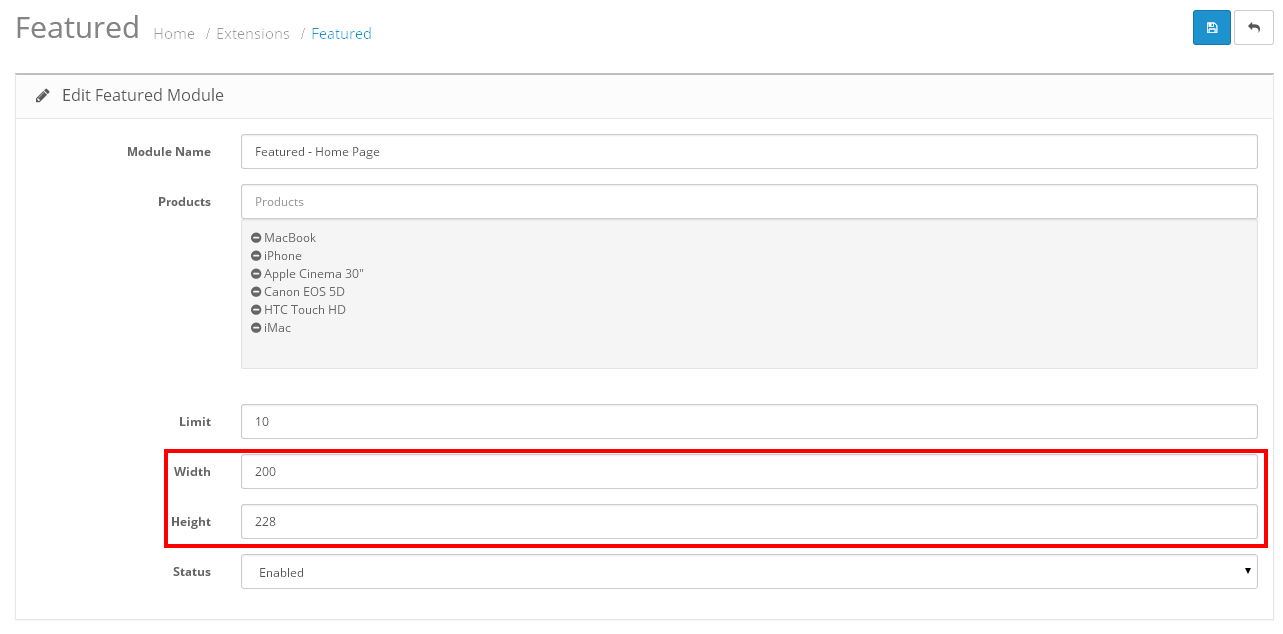
Now select Featured, then Edit (Click on Install link if Edit link in not there),
Give Module Name = Featured - Home Page
From Status select Enable,
Give Limit = 10,
Give Image size (200X 228),
Click on “Save” button.
Go to Extensions > Extensions. Select Modules from Dropdown.
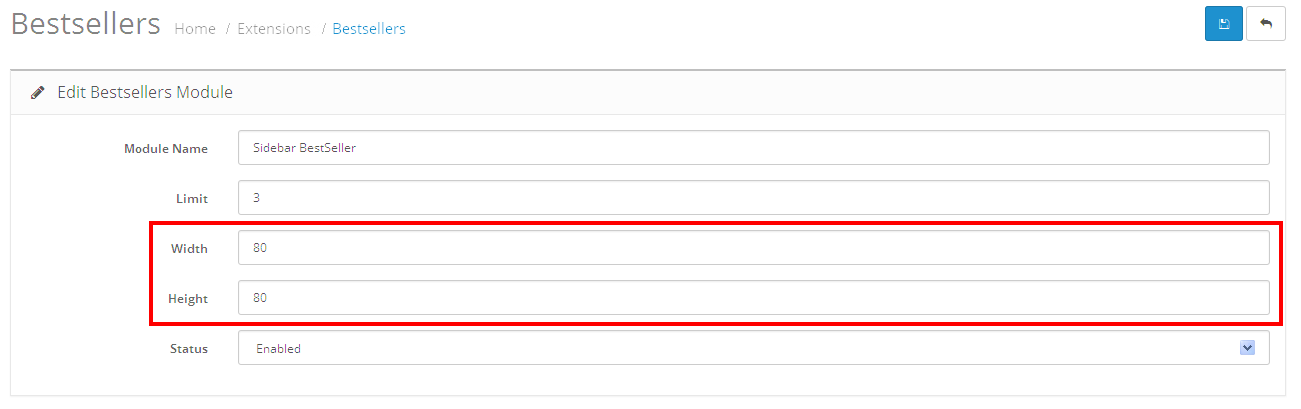
Now select Bestsellers, then Edit (Click on Install link if Edit link in not there),
Give Module Name = Sidebar BestSeller
From Status select Enable,
Give Limit = 3,
Give Image size (80 X 80),
Go to Extensions > Extensions. Select Modules from Dropdown.
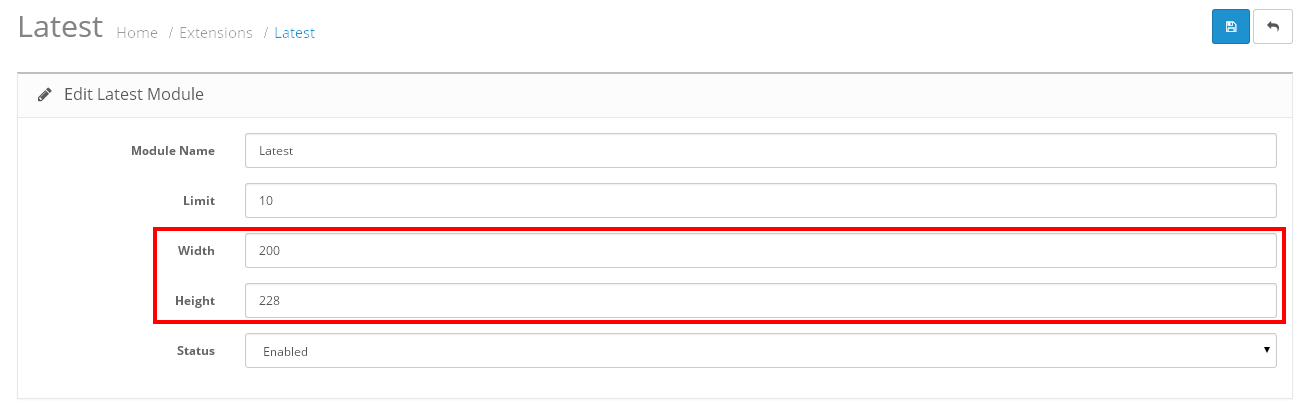
Now select Latest, then Edit (Click on Install link if Edit link in not there),
Give Module Name = Latest
From Status select Enable,
Give Limit = 10,
Give Image size (200 X 228),
Click on “Save” button.
Again Go to Extensions > Extensions. Select Modules from Dropdown.
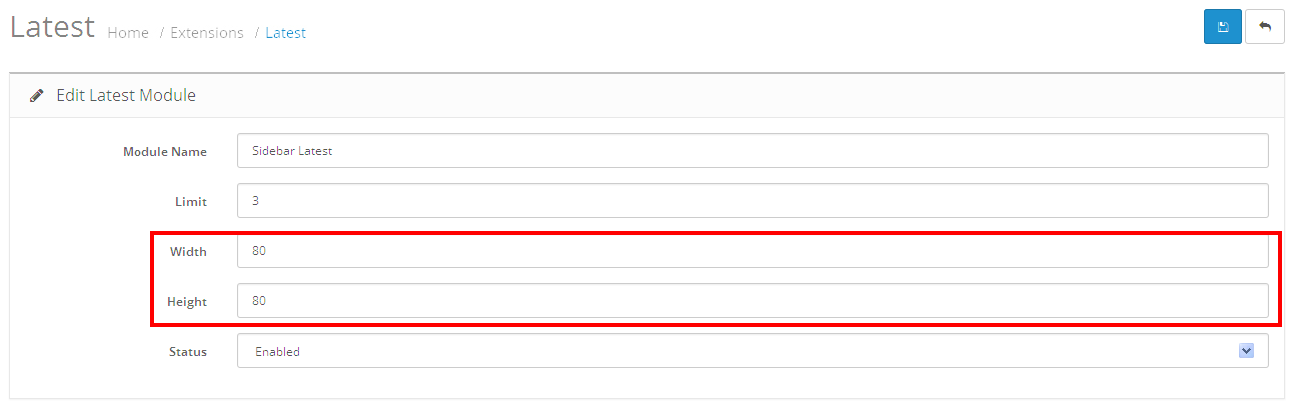
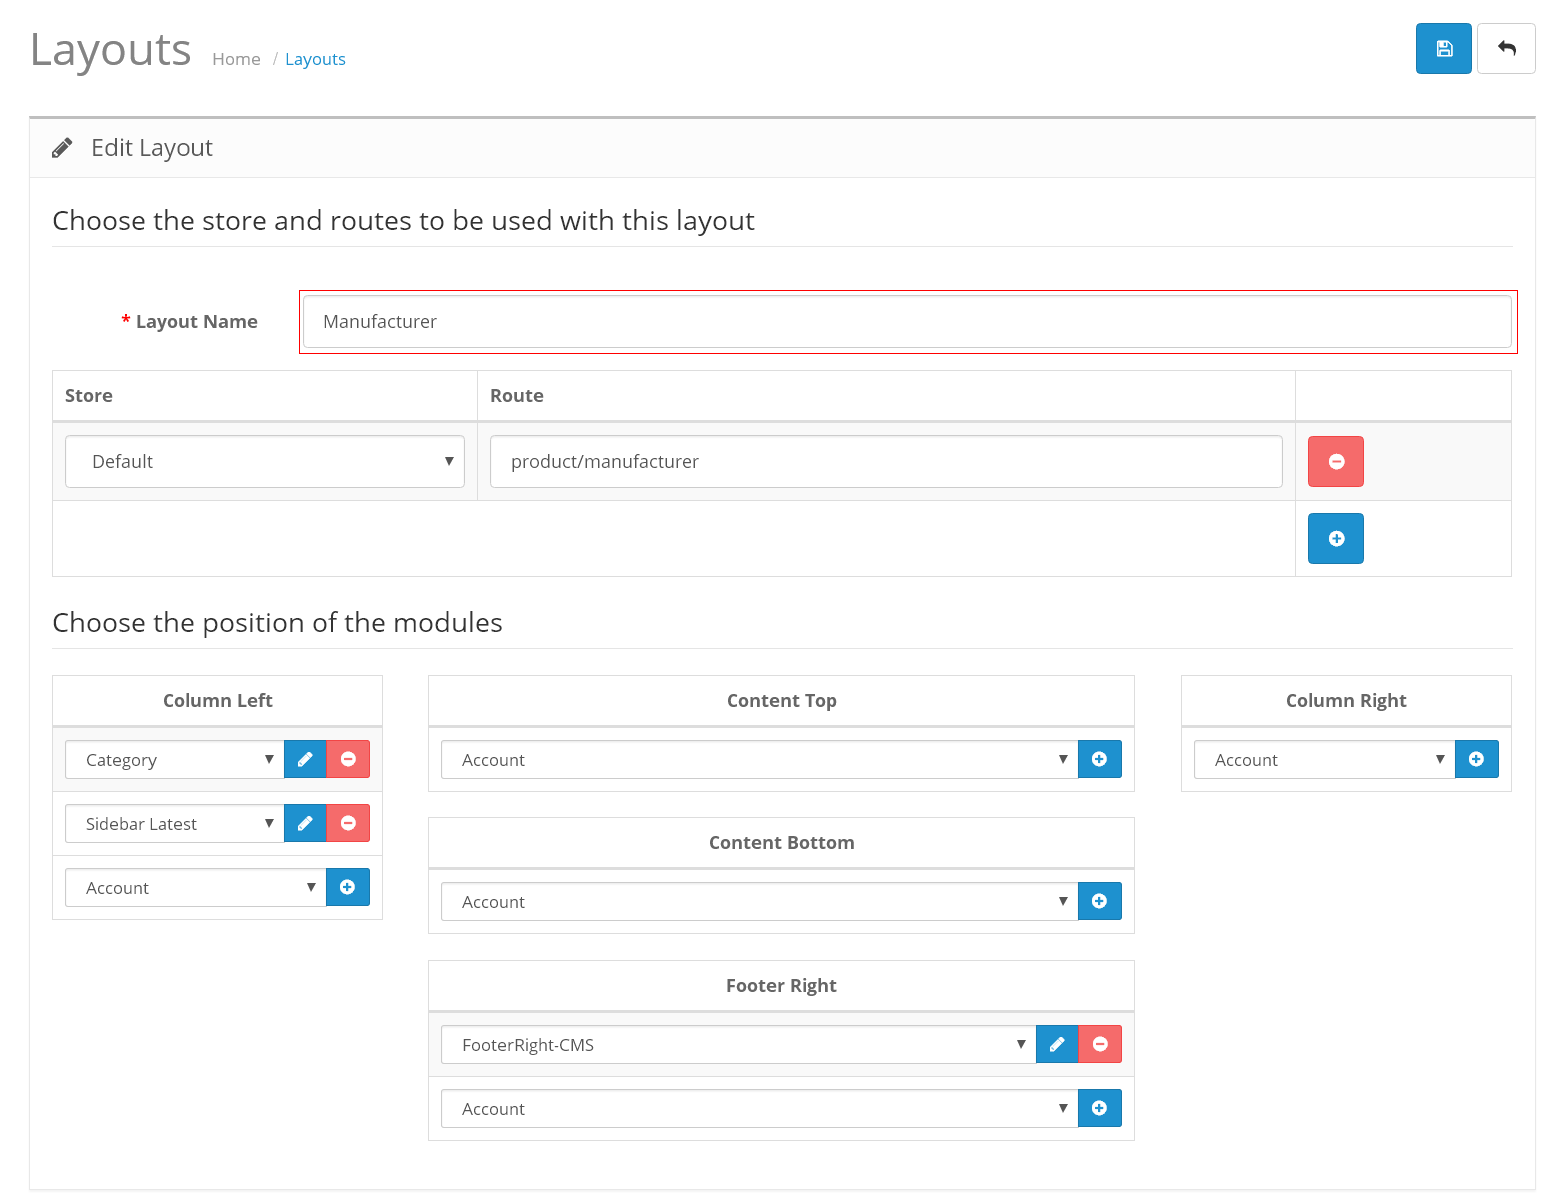
Now select Latest, then Edit (Click on Install link if Edit link in not there),
Give Module Name = Sidebar Latest
From Status select Enable,
Give Limit = 3,
Give Image size (80 X 80),
Click on “Save” button.
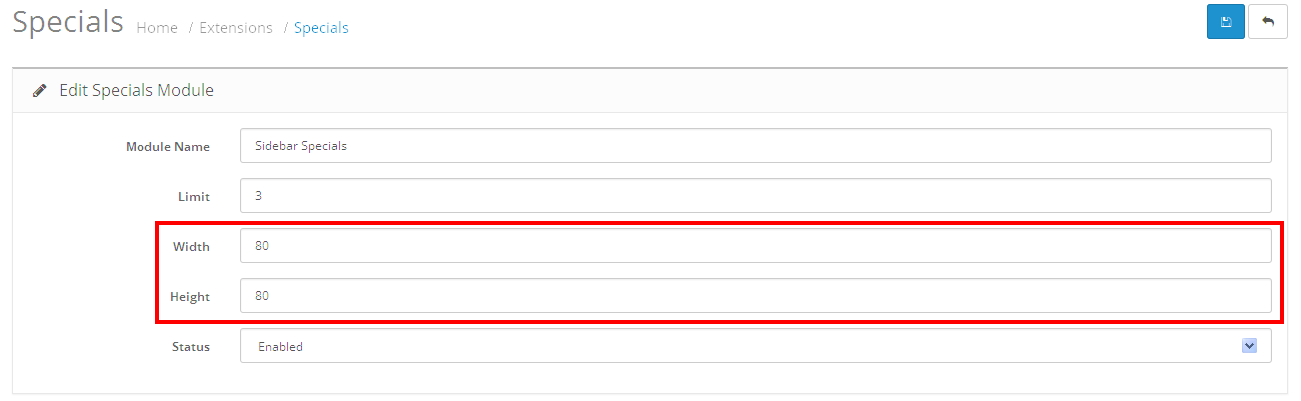
Go to Extensions > Extensions. Select Modules from Dropdown.
Now select Specials, then Edit (Click on Install link if Edit link in not there),
Give Module Name = Sidebar Specials
From Status select Enable,
Give Limit = 3,
Give Image size (80 X 80),
Click on “Save” button.
Go to Extensions > Extensions. Select Modules from Dropdown.
Now select Account, then Edit (Click on Install link if Edit link in not there),
From Status select Enable,
Click on “Save” button.
Go to Extensions > Extensions. Select Modules from Dropdown.
Now select Affiliate, then Edit (Click on Install link if Edit link in not there),
From Status select Enable,
Click on “Save” button.


Once again, thank you so much for purchasing the theme. We are glad to help you if you have any questions relating to this theme. You can contact us and submit technical Supprot Ticket from our support desk https://www.templatemela.com/support/